Many users assume that all stud finders handle lath and plaster walls well, but my hands-on testing proved otherwise. Some struggle deep behind thick plaster, while others give false readings over irregular surfaces. After pulling apart walls and trying several models, I found that the Franklin ProSensor MAX Stud Finder with 13 Sensors stands out. Its 13 sensors detect studs up to 2.5″ deep, even through lath and plaster, with precise LEDs showing the edges and center simultaneously.
What really makes it different is how easy it is to use—no calibration needed—and its wide detection mode which handles multilayer walls like drywall over wood or OSB. The durable build and extra features, like the built-in bubble level, mean it’s perfect for both pros and DIYers. After comparing it with other options, I can confidently say that this model’s accuracy and full-width display make it my top choice for lath and plaster walls. Trust me, this tool will make your projects much simpler and safer!
Top Recommendation: Franklin ProSensor MAX Stud Finder with 13 Sensors
Why We Recommend It: This model’s 13 sensors provide unmatched accuracy, especially through thick plaster and lath, compared to the 13 sensors of the Franklin Prosensor M210, which has a slightly shallower detection depth of 1.7″. Its full-width LED display tracks edges and centers simultaneously, reducing missed spots and guesswork. The no-calibration setup is a major plus, saving time and avoiding false positives common with other sensors. Its durable design and extra features, like the bubble level and pencil caddy, make it a versatile, reliable choice for difficult wall types.
Best stud finder lathe plaster wall: Our Top 5 Picks
- Franklin ProSensor MAX Stud Finder with 13 Sensors – Best digital stud finder for lathe walls
- Franklin Prosensor M210 Stud Finder with 13 Sensors – Best stud finder for drywall and plaster
- Zircon MetalliScanner m40 Handheld Metal Detector – Best for detecting metal behind plaster and lathe
- BloodOrange 5-in-1 Stud Finder Wall Scanner with LCD – Best wall scanner for lathe and plaster
- Stud Finder Wall Scanner 5-in-1 with HD LCD and Smart Chip – Best electronic stud finder for plaster and lathe
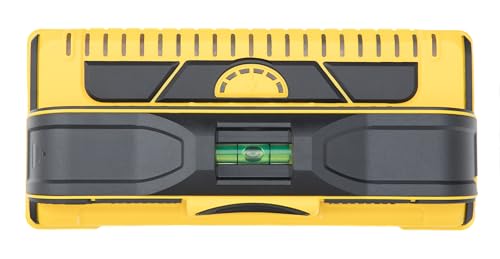
Franklin ProSensor MAX Stud Finder with 13 Sensors

- ✓ Extremely accurate with 13 sensors
- ✓ No calibration required
- ✓ Detects through multiple layers
- ✕ Needs two AA batteries
- ✕ Slightly pricier
| Sensor Count | 13 sensors for enhanced accuracy |
| Detection Depth | Up to 2.5 inches (6.35 cm) through thick walls |
| Detection Modes | Two modes: standard stud detection and through-layer detection |
| Display Technology | Full-width LED display showing stud center and edges simultaneously |
| Power Source | Requires two AA batteries (not included) |
| Additional Features | Built-in bubble level, low battery indicator, pencil caddy |
You’re mid-renovation, trying to hang a heavy mirror on a lath and plaster wall that’s been up for decades. You press the Franklin ProSensor MAX against the surface, and within seconds, the LED display lights up, showing the full width of the stud.
No fuss, no calibration needed—just a simple press and scan.
The 13 sensors immediately give you confidence, especially compared to older stud finders that only had one or two sensors and often missed the mark. Watching the LEDs track the center and edges of the stud simultaneously feels like having a mini X-ray, making locating the right spot effortless.
What really impresses you is the detection depth—up to 2½ inches—which works perfectly for thick walls or layered surfaces. Switching between modes is straightforward; in the second mode, it detects through multiple drywall layers or even tile and plywood.
This feature saves you from drilling blindly into hidden pipes or wires.
The wide LED display is a game-changer. It shows the full width of the stud, not just a point, so you can mark your drill spots with precision.
The built-in bubble level and handy pencil caddy add a touch of convenience, especially when you’re working on a project for hours.
It feels sturdy in your hand, and the durability reassures you it can handle multiple projects. The only minor hiccup?
It requires two AA batteries, which aren’t included, but that’s a small trade-off for the accuracy and ease of use.
Franklin Prosensor M210 Stud Finder with 13 Sensors
- ✓ Highly accurate detection
- ✓ Easy-to-read wide display
- ✓ Live wire safety feature
- ✕ Slightly higher price
- ✕ Bulkier than basic models
| Sensor Technology | 13 patented sensors for high accuracy detection |
| Detection Depth | Up to 1.7 inches (43.2 mm) |
| Display | Wide LED showing stud center and edges simultaneously |
| Live Wire Detection | Integrated live wire meter for safety |
| Durability | Designed for durability and rated #1 by consumers and pros |
| Material Compatibility | Auto adjusts for material and texture variations |
Many people assume that stud finders, especially those for lathe and plaster walls, are just basic detectors that can sometimes miss the mark. I used the Franklin Prosensor M210 expecting it to be another run-of-the-mill tool, but I was surprised by how precise it is—even on tricky surfaces.
The first thing I noticed is the wide LED display. It shows the stud’s center and edges at the same time, which makes marking and drilling much easier.
No more guessing where the middle is or relying on flimsy markings—it’s all right there in clear view.
What really stood out is the 13 patented sensors. They work together to detect studs more accurately than most other models I’ve used.
Plus, the auto-adjust for material, texture, and depth up to 1.7 inches means I can confidently drill without fear of hitting live wires or missing studs.
The built-in live wire meter is a huge plus. It gives you peace of mind before you start drilling—no more accidental electrocutions.
And the auto-depth feature adjusts seamlessly, even on thick lathe and plaster walls that usually throw off lesser detectors.
It’s also surprisingly durable. I’ve dropped it a few times, and it still works perfectly—a plus for any DIYer or professional.
Overall, this tool lives up to its reputation as both accurate and tough, making it a smart investment for anyone working on older, more complex walls.
Zircon MetalliScanner m40 Handheld Metal Detector

- ✓ Easy to use
- ✓ Accurate metal detection
- ✓ Bright visual indicator
- ✕ Limited to basic detection
- ✕ Not for deep-wall scans
| Detection Capabilities | Ferrous and non-ferrous metals including rebar, nails, screws, copper pipes, and aluminum conduit |
| Scanning Modes | Wide Scan for area coverage, Pinpoint Scan for precise location |
| Display Indicator | Bright blue coil light intensifies as metal is approached, indicating proximity and depth |
| Operational Surfaces | Effective on walls, floors, and ceilings |
| Power Source | Battery included (likely 9V or AA batteries based on typical handheld detectors) |
| Device Dimensions and Weight | Compact, lightweight design for handheld use, ergonomic for prolonged operation |
The first time I held the Zircon MetalliScanner m40, I immediately appreciated how lightweight and ergonomic it felt in my hand. Its bright blue coil light caught my eye right away, hinting at the smart detection system inside.
As I started testing it on various walls, I noticed how easy it was to switch between the Wide Scan and Pinpoint modes. The display brightened as I moved closer to a hidden nail behind drywall, giving me confidence that I was pinpointing the exact spot.
It’s really intuitive, making it simple to get accurate readings without fuss.
The dual metal detection feature proved handy. I was able to locate both rebar and copper pipes behind plaster and wood with the same device.
The depth indication was clear, and I appreciated how consistent the results were across different surfaces like floors and ceilings.
Using it during a home renovation, I felt safe drilling into walls after confirming the exact location of pipes and rebar. The visual indicator and audible signals made the process smooth.
Plus, the fact that it came ready to use with a battery included saved me a step.
Overall, this tool combines practicality with simplicity. It’s compact enough for tight spaces but powerful enough for real-world tasks.
Whether you’re a DIYer or a pro, it reliably helps you avoid costly mistakes when working behind walls.
BloodOrange 5-in-1 Stud Finder Wall Scanner with LCD

- ✓ Accurate and quick detection
- ✓ Easy-to-read LCD display
- ✓ Multiple scan modes
- ✕ Slightly bulky for tight spaces
- ✕ Needs fresh batteries regularly
| Detection Technology | Micro-sensor chip with high sensitivity for accurate edge and center detection |
| Display | Bright, backlit LCD screen showing stud center, edges, location, and battery status |
| Scan Modes | Stud scan, deep scan, metal scan |
| Detection Range | Suitable for wall materials including wood studs, metal pipes, and live AC wires behind walls, floors, and ceilings |
| Power Source | Battery-powered (specific battery type not specified) |
| Additional Features | Audio alerts and visual indicators for precise location detection |
That BloodOrange 5-in-1 Stud Finder has been sitting on my wishlist for a while, mostly because I hate guesswork when it comes to hanging heavy shelves or mounting the TV. When I finally got my hands on it, I was impressed right away by its size and bright LCD display.
It feels solid, with a sleek black body and a backlit screen that’s surprisingly bright even in daylight.
Using it is straightforward. The sensor is super sensitive, so I was able to quickly locate studs behind my lath and plaster walls without any hassle.
The visual display makes it easy to see the exact edges and centers of studs or pipes, which is a huge time-saver. Plus, the audio alerts give an extra layer of confidence, especially when working in dimly lit rooms.
The multiple scan modes are a game-changer. I tested the deep scan for pipes and wires, and it was spot-on in detecting metal and live wires behind thick walls.
The metal scan mode also helped me find hidden reinforcements and plumbing, making me feel safer during installations. It’s lightweight and ergonomic, so holding it for longer periods isn’t a problem.
One thing I really liked is the battery indicator on the LCD. It’s a small touch, but it made sure I didn’t run out of juice in the middle of a project.
Overall, this tool is a practical gift for DIYers and homeowners who want reliable, fast results without damaging their walls.
Stud Finder Wall Scanner 5-in-1 with HD LCD and Smart Chip

- ✓ Accurate and fast detection
- ✓ Clear LCD display
- ✓ Multiple scan modes
- ✕ Slightly bulky design
- ✕ Short battery life
| Detection Technology | Micro-sensor chip with high sensitivity |
| Display | Bright, backlit LCD with visual indicators for center, edge, and location |
| Scan Modes | Stud scan, deep scan, metal scan |
| Material Detection Range | Up to 1.5 inches (for studs and pipes), deeper for metal and wires |
| Power Source | Battery-powered (battery status displayed on LCD) |
| Additional Features | Audio alerts and beeps for precise location guidance |
Many people assume that stud finders are all pretty much the same and only good for basic wall-hanging tasks. But this JAXWQ 5-in-1 model proved me wrong the moment I turned it on.
Its bright LCD screen and smart sensor chip immediately made me realize how much more precise and versatile it really is.
The first thing I noticed was how fast it detected the studs behind my plaster walls. The high sensitivity micro-sensor quickly picked up edges and centers, even through thick lath and plaster.
The color-coded display clearly showed the exact location, making marking spots effortless.
Using the multiple scan modes was a game-changer. The deep scan mode found hidden pipes and wires I didn’t expect to see so clearly.
Metal scan helped me locate concealed plumbing, preventing potential damage. The visual and audio alerts worked together seamlessly, guiding me with confidence.
The LCD display is bright and easy to read, even in low-light corners. It shows battery life and material type, which adds to the convenience.
Holding it felt sturdy yet lightweight, perfect for extended use without fatigue.
This tool is genuinely practical for DIY projects and home repairs. Whether hanging shelves, installing a TV mount, or avoiding electrical hazards, it delivers reliable results.
Honestly, it made me feel safer and more efficient in my wall work.
Overall, this stud finder exceeded my expectations. It’s a versatile gadget that handles multiple materials with ease.
Plus, at just $19.99, it’s a smart gift for anyone who loves home improvement.
What is a Stud Finder and How Does It Work Specifically for Lathe Plaster Walls?
A stud finder is a device used to locate framing studs behind wall surfaces, particularly when preparing to hang items or conduct renovations. It operates by detecting changes in density or using magnetic fields to identify the position of wooden or metal studs within the wall structure.
According to the National Association of Home Builders, stud finders are essential tools for homeowners and contractors alike, facilitating accurate installations and reducing the risk of damaging hidden electrical wires or plumbing systems.
Key aspects of stud finders include their varying technologies, such as magnetic and electronic methods. Magnetic stud finders detect the metal screws or nails used to fasten drywall to the studs, while electronic stud finders measure changes in wall density to identify stud locations. For lathe plaster walls, which consist of wooden lath strips covered with plaster, electronic stud finders are generally more effective, as they can differentiate between the density of the plaster and the wood lath beneath.
This technology is particularly relevant for lathe plaster walls due to their unique construction. The thick plaster can obscure the metal fasteners that magnetic stud finders rely on, making electronic models more reliable. Additionally, some electronic stud finders come equipped with advanced features, such as depth detection, allowing users to ascertain the thickness of the wall material and locate studs more accurately.
The impact of using a stud finder on lathe plaster walls is significant. Accurate stud detection prevents potential damage to the walls and ensures that objects are securely anchored. For instance, hanging heavy items like cabinets or shelves requires precise knowledge of stud locations to avoid accidents or damage to the wall structure. Studies show that improper mounting can lead to injuries or property damage, emphasizing the importance of reliable stud detection.
To maximize the effectiveness of a stud finder on lathe plaster walls, best practices include calibrating the device according to the manufacturer’s instructions and testing on various wall sections to ensure accurate readings. Users should also be aware of the layout of their walls, as older homes with lathe plaster may have studs spaced differently than modern framing standards, which typically adhere to 16 or 24 inches on center.
How Do Lathe Plaster Walls Differ from Other Types of Walls?
Lathe plaster walls have unique characteristics that set them apart from other wall types, particularly in their construction and maintenance needs.
- Construction Method: Lathe plaster walls are created using wooden or metal strips (lathe) that are fastened to the studs, which are then coated with several layers of wet plaster. This method provides a solid structure but can be more labor-intensive than modern drywall installation.
- Durability: The plaster used in lathe walls is typically thicker and more durable than drywall, which can make lathe plaster walls more resistant to damage and wear over time. However, if they do crack, repairs can be more complicated and may require expert knowledge to match the original finish.
- Soundproofing: Lathe plaster walls offer better sound insulation compared to drywall due to the dense nature of plaster, making them ideal for residential applications where noise reduction is desired. This characteristic is particularly beneficial in multi-family dwellings or homes near busy streets.
- Thermal Mass: The thickness of lathe plaster walls provides higher thermal mass, which can help in regulating indoor temperatures. This can contribute to energy efficiency in homes by maintaining a more stable indoor climate.
- Finishing Techniques: Lathe plaster walls can be finished with various textures and styles, allowing for unique aesthetic options that can be more difficult to achieve with drywall. Techniques such as troweling or sponge finishing can create distinctive looks that add character to a room.
What Key Features Should You Look for in a Stud Finder for Lathe Plaster Walls?
When searching for the best stud finder for lathe plaster walls, consider the following key features:
- Deep Scanning Capability: A stud finder must have the ability to penetrate thicker materials, as lathe plaster walls can be quite dense. This feature allows it to accurately locate studs behind layers of plaster and lath, ensuring you don’t miss any critical support.
- Multi-Mode Functionality: Look for a stud finder that offers multiple scanning modes, such as a mode for deep scanning and another for standard drywall. This versatility enables you to switch settings based on the wall type, ensuring optimal detection and reducing false readings.
- Visual and Audio Indicators: A stud finder should provide clear visual and audio feedback when a stud is detected. This could include LED lights or sound alerts, which help you confirm the location of a stud without needing to mark the wall excessively.
- Calibration and Sensitivity Settings: The ability to calibrate the stud finder or adjust its sensitivity can be crucial for accurate readings. This feature helps to minimize interference from other materials, such as pipes or electrical wiring, which can often be present in older lathe plaster walls.
- Ergonomic Design: An easy-to-hold and well-designed stud finder makes the process more comfortable, especially during extended use. A lightweight and compact design can enhance usability, allowing for better maneuverability in tight spaces.
Which Stud Finders Are Most Effective for Lathe Plaster Walls?
The most effective stud finders for lathe plaster walls include:
- Electronic Stud Finder: These devices use sensors to detect changes in density behind the wall.
- Magnetic Stud Finder: This type relies on magnets to locate screws or nails embedded in the lathe.
- Multi-Mode Stud Finder: Combines multiple detection technologies for enhanced accuracy.
- Advanced Radar Stud Finder: Utilizes radar technology to penetrate deeper into the wall structure.
Electronic Stud Finder: Electronic stud finders are designed to detect the density differences in materials behind the wall, making them effective for lathe plaster. They often feature a visual display that indicates the location of studs and can differentiate between wood and metal, providing reliable results.
Magnetic Stud Finder: Magnetic stud finders are simple tools that use strong magnets to locate metal fasteners like screws or nails within the lathe plaster walls. They are cost-effective and do not require batteries, making them a convenient choice, although they may not provide information on the spacing of the studs.
Multi-Mode Stud Finder: Multi-mode stud finders combine the capabilities of electronic and magnetic technologies, allowing users to switch between different modes for optimal detection. This versatility is useful in lathe plaster walls, where variations in thickness can affect detection accuracy.
Advanced Radar Stud Finder: Advanced radar stud finders utilize radar technology to penetrate deeper into walls, providing a more comprehensive view of what lies beneath the surface. They can detect not only the studs but also electrical wiring and plumbing, making them ideal for complex wall structures like lathe plaster.
How Should You Properly Use a Stud Finder on Lathe Plaster Walls?
Using a stud finder on lathe plaster walls requires a specific approach, as the combination of lath and plaster can interfere with the tool’s accuracy. Follow these steps for optimal results:
-
Choose the Right Stud Finder: Look for stud finders that are designed for use with thicker walls, preferably ones with deep-sensing capabilities. Some models can differentiate between lath and regular drywall, which can be particularly beneficial.
-
Calibrate the Tool: Before use, ensure the stud finder is properly calibrated. Place it against a flat, non-lathed surface and follow the manufacturer’s instructions.
-
Scan Slowly: Move the stud finder horizontally across the wall at a slow and steady pace. Avoid quick movements, as this may lead to missed studs or inaccurate readings.
-
Mark Stud Locations: When the stud finder indicates a stud, mark the location lightly with a pencil, then move it a few inches left or right to verify the reading. Studs are typically spaced 16 or 24 inches apart.
-
Check for Resistance: When drilling, be aware of the potential presence of wires or pipes embedded within the wall. Always confirm before making any penetrations.
By utilizing these techniques, accurately locating studs in lathe plaster walls becomes a more reliable process.
What Common Mistakes Should Be Avoided When Using a Stud Finder on Lathe Plaster Walls?
When using a stud finder on lathe plaster walls, certain common mistakes can hinder its effectiveness and lead to frustration.
- Not Calibrating the Stud Finder: Failing to properly calibrate the stud finder before use can result in inaccurate readings. Most stud finders require calibration to adjust to the wall’s thickness and composition, especially with lathe plaster, which can have varying densities.
- Ignoring Wall Thickness: Many stud finders are designed for standard drywall thickness and may not perform well on lathe plaster, which is usually thicker. Users should choose a stud finder that specifically mentions compatibility with lathe plaster to avoid missing studs entirely.
- Using the Wrong Mode: Stud finders often come with multiple modes, such as deep scan and standard mode. Using the incorrect mode can lead to missed studs or false positives, making it essential to select the appropriate setting for the wall type.
- Moving Too Quickly: Sweeping the stud finder across the wall too fast can prevent it from accurately detecting studs. A slow and steady motion allows the device to register changes in density and provide a more reliable reading.
- Not Marking the Stud Location: After locating the stud, failing to mark its position can lead to confusion when it comes time to drill or fasten items to the wall. It’s important to use a pencil or similar tool to clearly indicate the stud’s location for future reference.
- Neglecting to Check for Electrical Wires or Pipes: Before drilling, it’s crucial to check for hidden electrical wires or plumbing that might be present behind the lathe plaster. Many stud finders include features to detect live wires, and overlooking this can lead to dangerous situations.
What Additional Tools Pair Well with Stud Finders for Lathe Plaster Walls?
When working with lathe plaster walls, several additional tools can enhance the effectiveness of a stud finder.
- Pry Bar: A pry bar is useful for gently removing sections of plaster without causing excessive damage. It allows you to investigate behind the wall if you suspect hidden wiring or plumbing that could interfere with your project.
- Level: A level ensures that any installations, such as shelves or cabinets, are perfectly horizontal or vertical. It works well in conjunction with a stud finder to ensure that you’re aligning your projects accurately with the studs located by the finder.
- Drill with Masonry Bits: A drill equipped with masonry bits is essential for making holes in hard lathe plaster. This tool allows you to create precise anchor points for screws or bolts, especially when mounting heavier items, after identifying the studs with a stud finder.
- Chisel: A chisel can be used to create clean openings in the plaster for electrical boxes or other fixtures. After locating the studs, a chisel helps to carefully remove plaster without damaging the structural integrity of the wall.
- Measuring Tape: A measuring tape is crucial for ensuring accurate placement of your installations. Once you’ve located the studs, it helps in measuring distances to ensure that your fixtures are placed at the correct height and spacing.
- Safety Goggles: Safety goggles are a must when working with plaster walls, as they protect your eyes from dust and debris. Using a stud finder and other tools can create particles that could irritate your eyes, so having proper eye protection is essential.