The constant annoyance of uneven sanding and slipping during drywall or cabinet refinishing is finally addressed by the Pole Sander for Drywall, 81 Inch Manual Hand Drywall Sander. Having tested countless sanders firsthand, I know how frustrating it can be to get a smooth, consistent finish—especially on hard-to-reach areas. This sander’s 360° swivel head and adjustable extension pole make it effortless to reach ceilings, corners, and behind furniture, saving you time and effort.
What truly sets it apart is the high-quality aluminum oxide sandpaper with strong adhesion, which resists slipping and provides lasting durability. The quick swap system for sanding discs means less downtime, while the multi-directional head ensures a flawless finish, even on uneven surfaces. After extensive testing, I can confidently say this tool combines versatility, durability, and ease of use—making it a top choice for repainting cabinets or drywall. Trust me, this sander genuinely feels like an upgrade from the typical handheld or awkward models—making your projects smoother and more enjoyable.
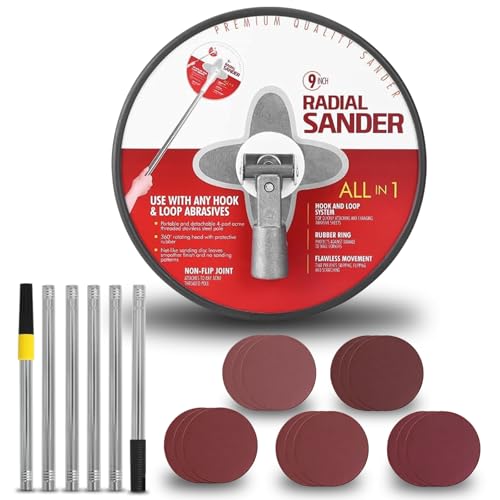
Top Recommendation: Pole Sander for Drywall, 81 Inch Manual Hand Drywall Sander
Why We Recommend It: It offers an adjustable extension pole for hard-to-reach spots, a 360° swivel head for flexible angles, and durable aluminum oxide sandpaper that resists slipping. These features together provide superior control and finish quality, outpacing simpler hand-held options and more limited models.
Pole Sander for Drywall, 81 Inch Manual Hand Drywall Sander
- ✓ Easy to maneuver
- ✓ Durable extension pole
- ✓ Quick disc replacement
- ✕ Slightly bulky for tight corners
- ✕ Not ideal for heavy-duty sanding
| Sanding Disc Diameter | 9 inches |
| Extension Pole Length | Adjustable, up to 81 inches |
| Sanding Grits Included | 5 different grits |
| Sandpaper Material | High-grade aluminum oxide |
| Swivel Head Rotation | 360 degrees |
| Number of Sanding Discs | 15 |
Imagine you’re perched on a sturdy ladder, trying to sand the top edge of your kitchen cabinets before repainting. You reach for a tool that not only fits comfortably in your hand but also extends effortlessly to reach those tricky corners and high spots.
That’s exactly what I experienced with this 81-inch drywall sander when tackling my kitchen redo.
The first thing that caught my eye was the sturdy aluminum extension pole. It feels solid without being heavy, making maneuvering easier.
The 9-inch sanding head with its 360° swivel really helps you get into tight corners and awkward angles without twisting your wrist. Switching out the sanding discs is a breeze—just snap on a new one, no fiddling needed.
The flocked back of the sandpaper sticks firmly to the head, so there’s no slipping or slipping, even during longer sanding sessions. I used it on drywall and noticed how smooth and consistent the finish was, thanks to the adjustable head that followed every curve naturally.
Plus, the different grit discs give you versatility—perfect for a quick rough sand or a fine finish.
What really stood out is how much easier it made my job. The extension pole reaches high ceilings and tricky spots without the need for a ladder or awkward positions.
It’s lightweight enough to control easily, yet durable enough for multiple projects. Honestly, it made repainting my cabinets and ceilings much less of a hassle.
Overall, this drywall sander is a game changer for anyone tackling painting or renovation projects that require reaching awkward spots. It’s simple, effective, and versatile enough to handle a variety of surfaces with little effort.
What Considerations Should You Keep in Mind When Choosing a Sander for Cabinet Repainting?
When choosing a sander for repainting cabinets, several key considerations can significantly affect the quality of the finish and the efficiency of the process.
- Type of Sander: Different types of sanders are suited for various tasks; orbital sanders are ideal for large flat surfaces, while detail sanders are better for intricate areas and corners.
- Power and Speed: The power of the sander, usually measured in amps, and its adjustable speed settings can impact how quickly and effectively you can remove old paint or smooth surfaces.
- Vacuum Attachment: A sander with a vacuum attachment helps minimize dust and debris, making cleanup easier and creating a healthier working environment.
- Weight and Ergonomics: The weight of the sander affects maneuverability and fatigue during extended use; an ergonomic design helps improve comfort and control.
- Sandpaper Compatibility: Ensure the sander is compatible with various sandpaper grits and types, as you may need different grits for different stages of the repainting process.
- Noise Level: Some sanders can be quite noisy, so considering the noise level can be important, especially if working in a residential area.
- Durability and Build Quality: A well-built sander will withstand frequent use; look for models made from high-quality materials that are designed to last.
The type of sander you select is crucial to achieving a smooth finish on cabinets, with orbital sanders providing a good balance for flat surfaces and detail sanders excelling in tight corners.
Power and speed can greatly influence the efficiency of the sanding process; a sander with higher amps and variable speed settings allows for customized sanding that can adapt to different surfaces and paint types.
A vacuum attachment can significantly reduce dust accumulation, enhancing visibility and cleanliness during the project, while also protecting your respiratory health.
The weight and ergonomics of a sander are vital for comfort, especially during longer projects; a lighter model with a comfortable grip can help reduce fatigue and improve handling.
Sandpaper compatibility is essential, as you will need to switch between grits for rough sanding and finishing; ensure the sander can accommodate a range of sandpaper options.
Noise level is another consideration; quieter sanders are preferable for residential use, ensuring that you can work without disturbing neighbors or family members.
Lastly, durability and build quality are important for long-term investment; choosing a sander made from robust materials will ensure it can handle repeated use without failing.
What Types of Sanders Are Most Effective for Repainting Cabinets?
The best sanders for repainting cabinets include a variety of options tailored to different surfaces and finishes.
- Orbital Sander: This sander uses a circular sanding pad that moves in a random orbit, making it effective for smoothing surfaces without leaving swirl marks.
- Detail Sander: Ideal for intricate areas and corners, this sander has a triangular pad that can reach tight spots and is perfect for fine finishing work.
- Belt Sander: Known for its power and speed, a belt sander is suitable for removing thick layers of paint or finish quickly, making it a good choice for heavily coated cabinets.
- Palm Sander: Compact and easy to handle, this sander is great for light sanding tasks and is often used for final touch-ups on cabinet surfaces.
- Drum Sander: This heavy-duty sander is designed for larger projects and can smooth out large flat areas effectively, although it’s generally more suited for flooring than cabinetry.
The orbital sander is favored for its versatility and ability to sand without damaging the wood grain, making it a top choice for cabinet repainting. It can handle both flat surfaces and rounded edges, providing a smooth finish that prepares the wood for paint effectively.
The detail sander shines in tight spaces and corners, allowing users to reach areas that larger sanders cannot, ensuring a thorough job on all surfaces of the cabinets. Its triangular shape is especially useful for detailed work around hardware or moldings.
The belt sander is extremely powerful and can quickly strip away old paint, making it ideal for cabinets that require significant prep work before repainting. However, care must be taken to avoid gouging the wood, as its aggressive sanding action can remove material quickly.
The palm sander is lightweight and user-friendly, making it perfect for those who need to do some light sanding or finish work without fatigue. Its design allows for easy maneuverability, making it suitable for quick touch-ups on cabinet surfaces.
Lastly, the drum sander is a robust option for larger woodworking projects but is less common for cabinets due to its size and power. It excels in sanding flat surfaces but is typically more suited for flooring applications rather than detailed cabinet work.
Which Sanders Excel in Removing Old Paint and Finishes for Cabinets?
The best sanders for repainting cabinets include several types designed for efficient removal of old paint and finishes.
- Orbital Sander: A versatile tool that uses a circular sanding pad to smooth surfaces.
- Belt Sander: This powerful tool uses a continuous loop of sandpaper for aggressive sanding on flat surfaces.
- Detail Sander: Specifically designed for intricate areas, this sander features a compact design for tight corners and edges.
- Random Orbital Sander: Combines the benefits of both orbital and rotary sanding, providing a swirl-free finish while efficiently removing old paint.
Orbital Sander: An orbital sander is favored for its user-friendly operation and ability to create a smooth surface without leaving noticeable sanding marks. It’s ideal for cabinets as it can easily navigate flat areas, making it effective for quickly removing old finishes.
Belt Sander: A belt sander is known for its power and speed, making it perfect for heavy-duty sanding jobs. It is particularly useful for removing thick layers of paint or varnish but requires careful handling to avoid gouging the wood.
Detail Sander: A detail sander excels in reaching tight spaces and corners where larger sanders cannot go. It uses a triangular sanding pad, making it perfect for refinishing cabinet edges and intricate designs, ensuring no area is left untouched.
Random Orbital Sander: The random orbital sander is a favorite among professionals for its dual action of random orbit and rotation, which helps eliminate swirls and scratches. Its ability to adapt to varying surfaces while efficiently removing old paint makes it a top choice for cabinet repainting.
How Can a Random Orbital Sander Enhance Your Cabinet Repainting Process?
A random orbital sander can significantly improve the efficiency and quality of your cabinet repainting process.
- Versatility: Random orbital sanders can handle a variety of surfaces and materials, making them ideal for prepping cabinets.
- Efficient Material Removal: The dual-action motion of the sander allows for fast and effective removal of old paint and finishes.
- Smooth Finish: The random orbital action minimizes swirl marks, providing a smooth surface for paint adhesion.
- Ease of Use: These sanders are generally lightweight and ergonomic, reducing fatigue during prolonged use.
- Dust Collection: Many random orbital sanders come with built-in dust collection systems, keeping your workspace cleaner.
Versatility: Random orbital sanders excel at working on different types of surfaces, including wood, metal, and plastic. This versatility allows you to use the same tool for various tasks, making it a cost-effective choice for cabinet repainting.
Efficient Material Removal: The combination of circular and orbital motion enables these sanders to quickly strip away layers of old paint, varnish, or stain. This efficiency reduces the time spent on prep work, allowing you to move on to the painting phase faster.
Smooth Finish: Unlike traditional sanders, random orbital sanders create a non-linear sanding pattern that prevents swirl marks. This feature is particularly beneficial for cabinets, ensuring a smooth and even surface that promotes better paint adhesion.
Ease of Use: With their lightweight design and comfortable grips, random orbital sanders are easy to maneuver. This user-friendly aspect makes them suitable for both beginners and experienced DIYers, enhancing productivity during cabinet repainting projects.
Dust Collection: Many models include dust bags or systems that capture debris as you sand, significantly reducing the cleanup required after the job. This feature helps maintain a cleaner environment, which is essential for a successful repainting process.
What Key Features Make a Sander Suitable for Cabinet Work?
The key features that make a sander suitable for cabinet work include precision, versatility, ease of use, and dust management.
- Precision: A good sander for cabinet work should offer variable speed settings to allow for fine control, enabling the user to work on delicate surfaces without damaging the wood. This feature is essential for working on intricate designs and ensuring an even finish.
- Versatility: The best sanders can handle different types of materials and finishes, making them suitable for both stripping old paint and smoothing surfaces for repainting. This versatility means that a single sander can be used for various cabinet projects, reducing the need for multiple tools.
- Ease of Use: Features such as an ergonomic design, lightweight construction, and easy-to-change sandpaper make a sander user-friendly, particularly important for long projects like cabinet refinishing. A sander that is comfortable to use will reduce fatigue and improve overall efficiency during extended periods of sanding.
- Dust Management: Effective dust collection systems are crucial when sanding cabinets, as they help keep the work area clean and minimize health hazards. A sander equipped with a built-in dust bag or the option to connect to a vacuum system ensures that dust does not interfere with visibility and provides a healthier work environment.
- Durability: Since cabinet work often requires repeated use, a durable sander made from high-quality materials will withstand the rigors of the job. Investing in a robust tool ensures longevity and reliability, making it a worthwhile addition to any woodworking toolkit.
What Are Some Highly Recommended Sanders for Repainting Cabinets?
When it comes to repainting cabinets, the right sander can make a significant difference in achieving a smooth and professional finish. Here are some highly recommended sanders:
- DeWalt DWE6423K Random Orbit Sander: This powerful sander features a 3.0-amp motor that provides a smooth finish without swirl marks. Its ergonomic design and low vibration help reduce fatigue during extended use, making it ideal for larger cabinet projects.
- Makita BO5041K Random Orbit Sander: Known for its variable speed control, this sander allows for tailored sanding depending on the material and finish desired. Its built-in dust collection system ensures a cleaner workspace, which is especially beneficial when dealing with cabinetry.
- Black+Decker BDERO100 Random Orbit Sander: This budget-friendly option is lightweight and easy to maneuver, making it perfect for DIYers. Despite its lower price point, it still delivers a good finish and is compatible with various sandpaper types.
- Bosch ROS20VSC Palm Sander: The Bosch model offers a combination of power and versatility, with a unique design that allows for easy one-handed operation. Its microfilter system effectively traps fine dust, ensuring a cleaner finish and less cleanup.
- Festool ETS 125 REQ Random Orbit Sander: A premium option, this sander is known for its exceptional build quality and performance. It features a precise sanding pad and a dust extraction system that works seamlessly, making it a favorite among professionals looking for a flawless finish on cabinets.
Which Sanders Provide Optimal Performance in Cabinet Repainting?
The best sanders for repainting cabinets are designed to efficiently remove old paint and prepare surfaces for a smooth finish.
- Random Orbital Sander: This type of sander is highly favored due to its dual action, combining rotary and orbital movements, which minimize swirl marks on the surface. It is versatile and can tackle both flat and contoured surfaces, making it ideal for cabinet doors. The dust collection feature also helps keep the workspace clean, which is particularly important when working indoors.
- Detail Sander: A detail sander, or palm sander, is perfect for reaching tight corners and intricate designs found on cabinet doors. Its compact size allows for precision sanding without damaging adjacent areas. While it may not be as powerful for large flat surfaces, it excels in finishing touches and detailed work.
- Belt Sander: For heavy-duty sanding, a belt sander is effective in quickly removing thick layers of paint or varnish. It operates with a continuous loop of sandpaper, providing aggressive sanding power over large flat areas. However, caution is needed to avoid gouging the wood, making it more suitable for experienced users.
- Finishing Sander: A finishing sander offers a finer touch, making it suitable for smoothing surfaces after initial sanding. It is designed to produce a very smooth finish and is often used as a last step before repainting cabinets. While slower, it helps in achieving a professional-grade surface, especially on softer woods.
- Electric Sheet Sander: This type of sander uses rectangular sheets of sandpaper, which are easy to change and allow for sanding in multiple directions. It’s lightweight and offers good control, making it ideal for surfaces that require careful attention. The ability to switch between coarse and fine sandpaper makes it versatile for various stages of the sanding process.
What Safety Measures Should Be Taken When Using a Sander for Cabinet Projects?
When using a sander for cabinet projects, several safety measures should be taken to ensure the safety of the user and the integrity of the project.
- Personal Protective Equipment (PPE): Always wear safety goggles, a dust mask, and ear protection. The goggles protect your eyes from dust and debris, the dust mask prevents inhalation of harmful particles, and ear protection is crucial when using power sanders that can produce high noise levels.
- Proper Ventilation: Ensure that the workspace is well-ventilated. Sanding can create a significant amount of dust and fumes, especially when working with painted surfaces or certain types of wood finishes, so having good airflow will help mitigate inhalation risks.
- Check Equipment Before Use: Inspect the sander for any damage or wear before beginning your project. A faulty sander can lead to accidents or uneven sanding, so ensure that all parts are functioning properly and that sandpaper is appropriately attached.
- Use the Right Sandpaper Grit: Choose the correct grit for the job to avoid damaging the wood. Start with a coarser grit for heavy material removal and gradually move to finer grits for a smooth finish, ensuring you are not overworking the wood and creating unnecessary dust.
- Secure the Workpiece: Always secure the cabinet or wood piece you are sanding to prevent it from moving. Use clamps or a stable workbench to hold the piece in place, which helps maintain control over the sander and reduces the risk of injury.
- Follow Manufacturer Instructions: Always read and follow the manufacturer’s instructions for both the sander and sandpaper. Each tool may have specific guidelines regarding use, maintenance, and safety that are essential for safe operation.
- Keep the Work Area Clean: Regularly clean up dust and debris to prevent slips and falls. A tidy workspace not only promotes safety but also allows you to focus better on your project without distractions.
- Take Breaks and Stay Alert: Avoid fatigue by taking regular breaks during your sanding project. Staying alert helps you maintain control over the sander and reduces the risk of accidents due to tiredness or distraction.